Creating ASP.NET Core Web Application
Creating ASP.NET Core Web Application
Creating ASP.NET Core Web Application
In this article, I am going to discuss how to create ASP.NET Core Web Application step by step from scratch. Please, read our previous article before proceeding to this article where we discussed what is the software required to develop and run the ASP.NET Core application based on your operating system. As part of this article, we are going to discuss the following two things.Creating a new ASP.NET Core Web Application step by step using Visual Studio 2019.
Different project templates that are available as part of .NET Core and what they are going to do.
Creating First ASP.NET Core Web Application using Visual Studio 2019
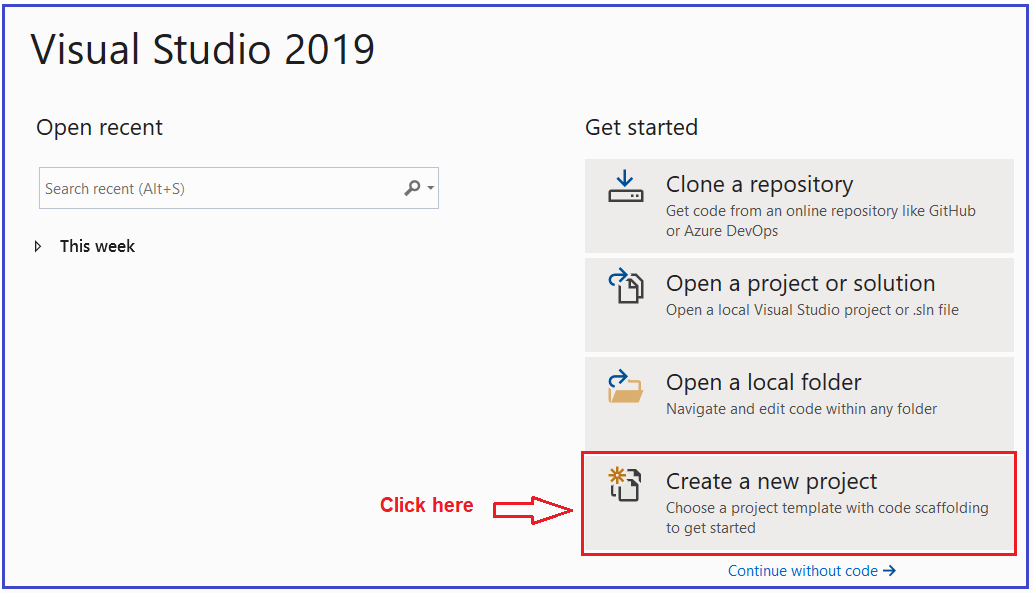
To create a new ASP.NET Core Project, Open Visual Studio 2019. And then click on the Create a new project box as shown in the below image.
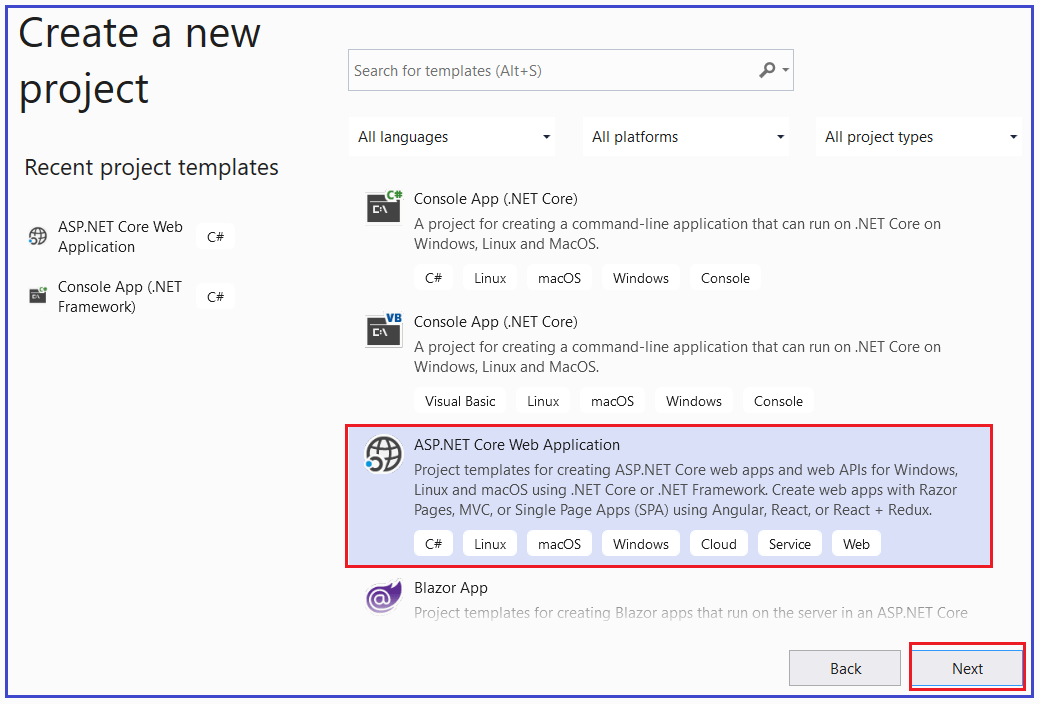
Once you click on the Create a new project box, it will open the “Create a new project” window. This window includes different .NET Core 3.1 application templates. Here we will create a simple web application, so select the ASP.NET Core Web Application template and click on the Next button as shown in the below image.
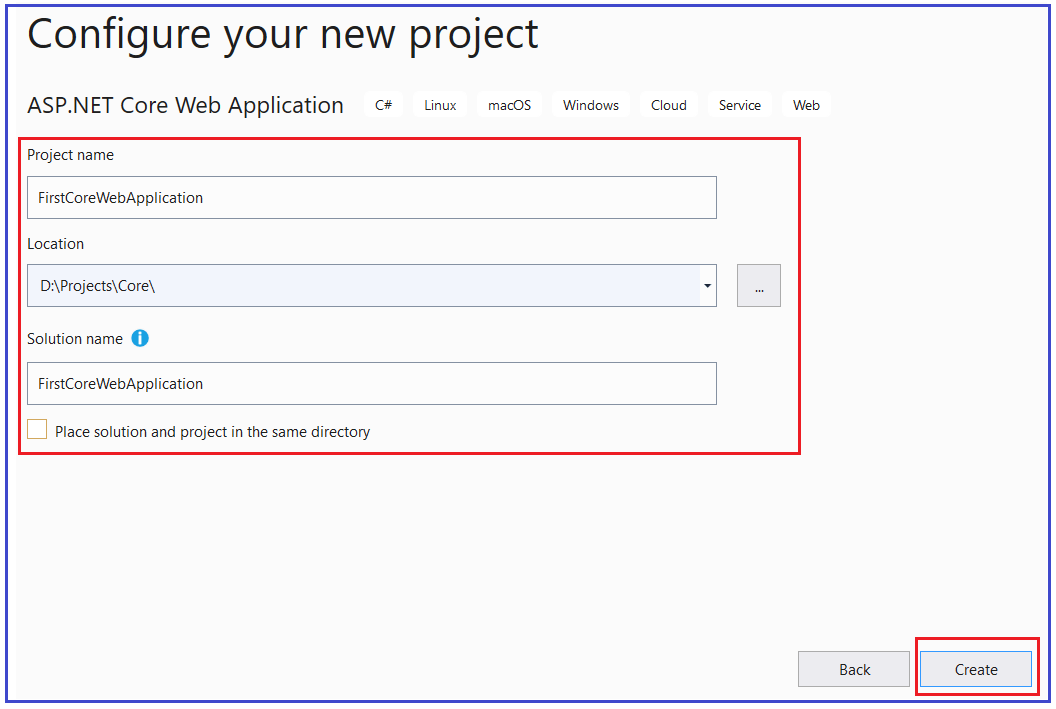
Once you click on the Next button, it will open the following Configure Your New Project window. Here, you need to give an appropriate name for your project, set the location where you want to create this project, the solution name for the ASP.NET Core Web application. In this example, we will give the name “FirstCoreWebApplication” and click on the Create button as shown in the image below.
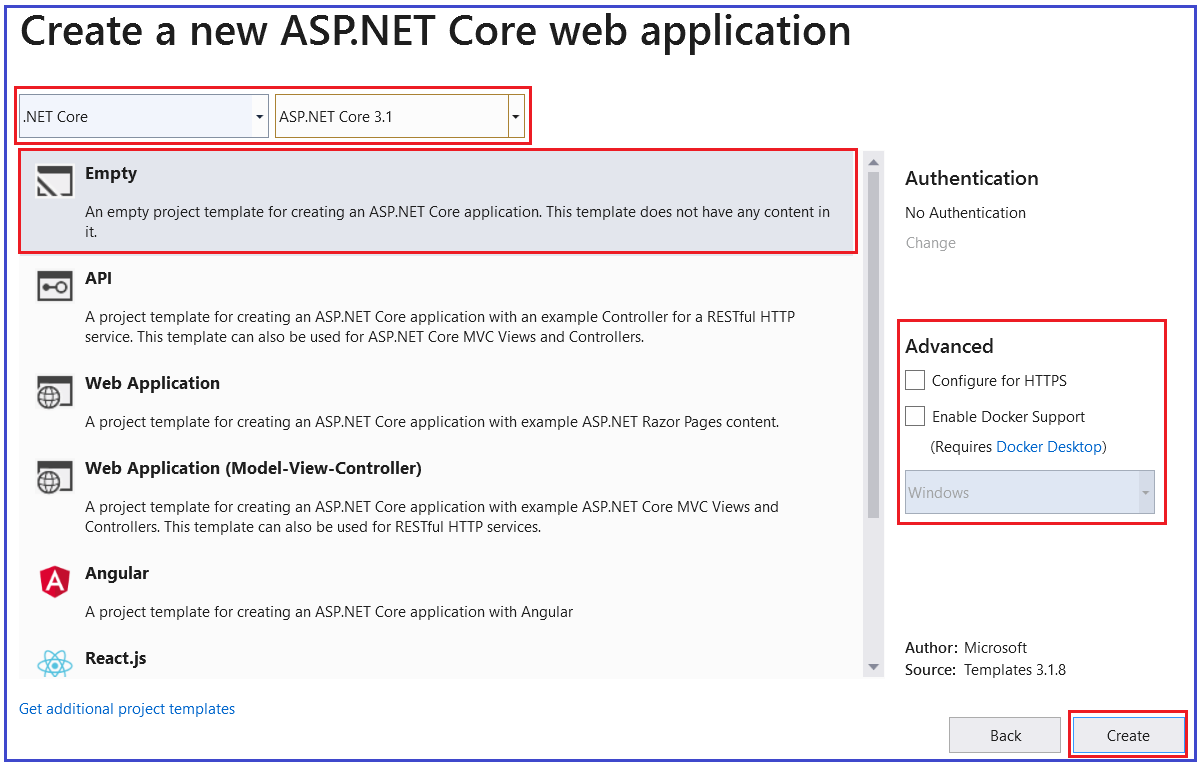
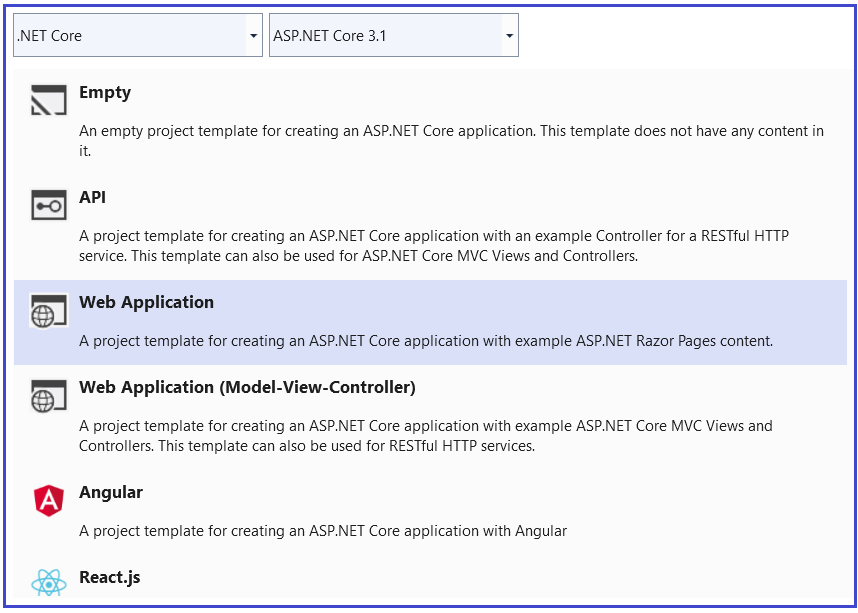
Once you click on the create button, it will open the Create a new ASP.NET Core Web Application as shown below. Here, you need to select the appropriate ASP.NET Core Web application template such as Empty, API, Web Application, Web Application (MVC), Angular, etc. Here in this demo, we are going to use the Empty template, so that you will understand how the different components fit together to develop an ASP.NET Core application. Also, make sure that you have selected the appropriate .NET Core and ASP.NET Core versions (latest 3.1). Make sure to uncheck all the checkboxes from the Advanced section and finally click on the Create button as shown in the below image.
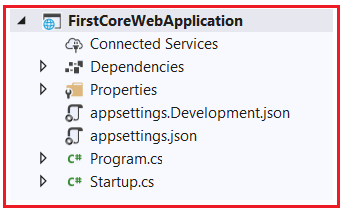
Once you click on the Create button, it will create a new ASP.NET Core Web Project in Visual Studio 2019. Wait for some time till Visual Studio restores the packages in the project. The restoring process means Visual Studio will automatically add, update or delete configured dependencies as NuGet packages in the project. The project will be created with the following file and folder structure in Visual Studio 2019.
Run the ASP.NET Core Application:
To run this web application, click on IIS Express or press F5 (with Debug) or Ctrl + F5 (without Debug). This will open the browser and display the following output.
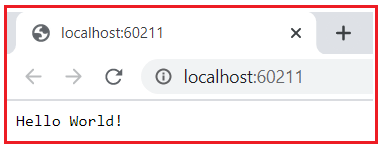
Here, the output “Hello World!” comes from the Configure method of the Startup class which is present inside the Startup.cs file Open Startup.cs file and then change the “Hello World!” string to something else and rerun the application and it will change the output accordingly.
Project templates in ASP.NET Core Application
As you can see in the below image, while creating ASP.NET Core Web Application, we have different types of project templates for creating ASP.NET Core Web applications.
So, let us discuss a little about all these project templates. In our upcoming articles, we will use and build the ASP.NET Core Web application using all these project templates.
Empty Project Template:
As the name says, the Empty Project Template does not have any content by default. If you want to do everything manually from scratch, then you need to select the Empty Template. The following image shows the structure of an Empty template.

Web Application (Model-View-Controller) Template:
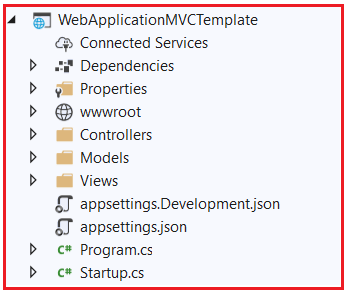
The Web Application (Model-View-Controller) template contains everything that is required to create an ASP.NET Core MVC Web Application. The Web Application (Model-View-Controller) template creates Models, Views, and Controllers folders. It also adds web-specific things such as JavaScript, CSS files, Layout files, etc. which are necessary and required in order to develop a web application. The following image shows the structure of a Web Application (Model-View-Controller) template.
API Template:
The API template contains everything that is required and necessary to create an ASP.NET Core RESTful HTTP service. The following image shows the structure of an API template.
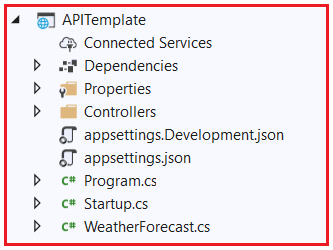
As you can see from the above image, it contains only the Controllers folder. The website-specific things such as CSS files, JavaScript files, view files, layout files, etc. are not present. This is because an API does not have any user interface hence it does not include such website-specific files. This API template also does not have the Models and Views folder as they are not required for an API.
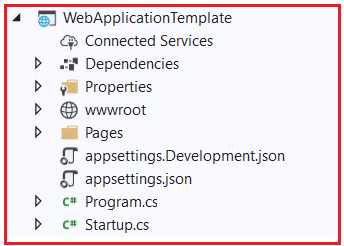
Web Application Template


Leave a Comment