How to Download & Install Java in Linux(Ubuntu)
How to Download & Install Java in Linux (Ubuntu)

Following is a step-by-step guide to install Java on Linux. In this training, we will install Java on Ubuntu.
The process and install commands remain the same, for different flavors of Linux, or versions of Java.
How to Install Oracle Java on Ubuntu Linux
Step 1) Before you start with the setting up Java, you will need to remove the OpenJDK/JRE from the system.
To do this, use below command-
sudo apt-get purge openjdk-\*
You will be asked for a confirmation. Enter Y

Wait for some time for uninstall to complete
Step 2) Check whether Ubuntu OS architecture is 32-bit or 64-bit.
You can do it using the following command-
file /sbin/init
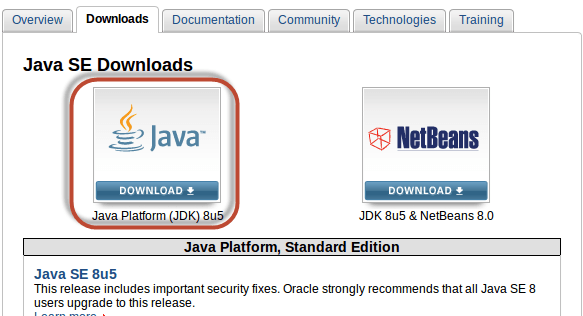
Step 3) Download latest Java (a zip file e.g., jdk-8-linux-x64.tar.gz) from Oracle site-
https://www.oracle.com/java/technologies/javase-downloads.html
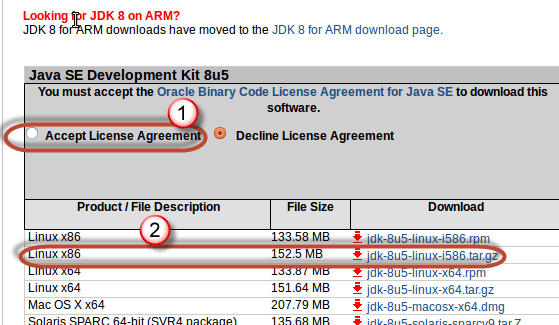
Accept the License Agreement
- Select x86 for 32-bit system
- Select x64 for 64-bit system
- Select the tar.gz for Ubuntu
- Select rpm for Debian based system
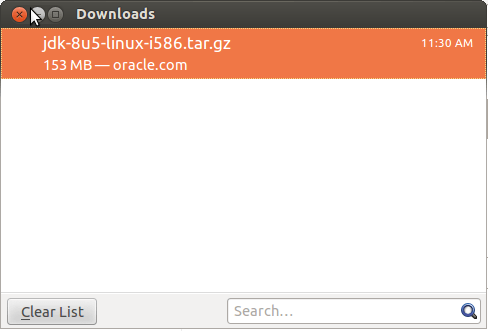
Once a download is complete you will see
Step 4) In the terminal, navigate to the location of your zip file
![]()
Extract contents of java zip file in a directory of your choice.
In this tutorial, we will extract in the Downloads folder itself –
sudo tar -xvf jdk-8u5-linux-i586.tar.gz![]()
Enter your password, if asked. The unzip will continue. Once done you will see the following folder –
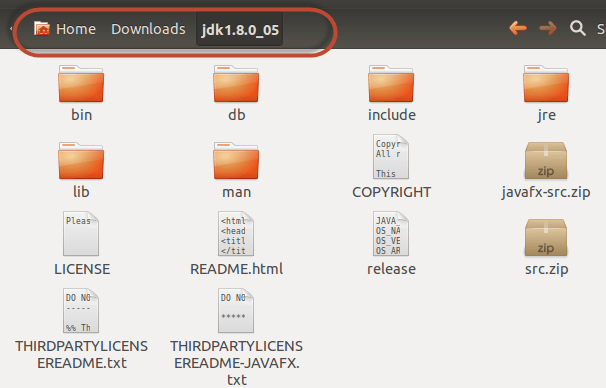
Step 5) Add the following system variables to the end of /etc/profile file
JAVA_HOME=<Directory where JAVA has been extracted>/jdk1.8.0
PATH=$PATH:$HOME/bin:$JAVA_HOME/bin
export JAVA_HOME
export PATH
To do so –
Enter command
"sudo nano /etc/profile"![]()
Enter the system variables
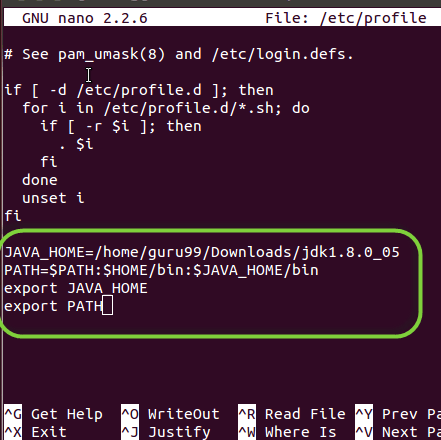
Press Control+C to enter into command mode
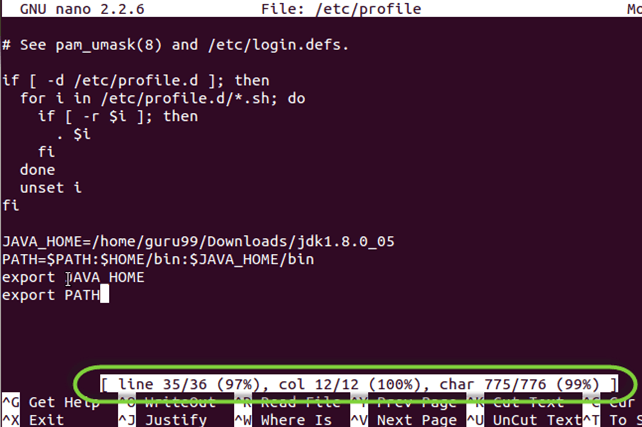
Press ^+X to Exit
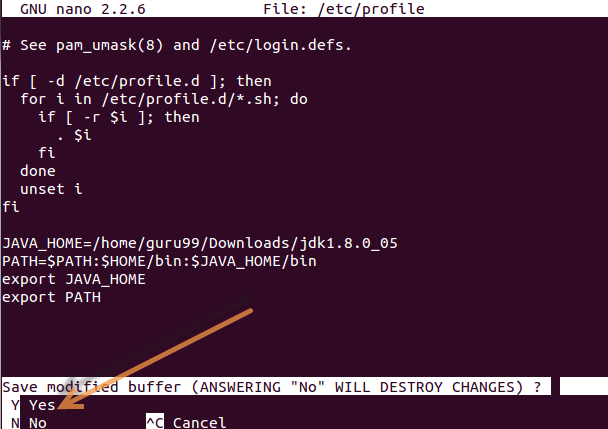
Press “Y” to save the changes
Step 6) Now reload environment using a command,
. /etc./profile![]()
Step 7) It's time to let Ubuntu know where our JDK/JRE is located.
Copy-paste below lines into a command prompt.
Sudo update-alternatives --install "/user/bin/java" "java" "<Directory where JAVA has been extracted>/bin/java" 1
sudo update-alternatives --install "/usr/bin/javac" "javac" "<Directory where JAVA has been extracted>/bin/javac" 1
Sudo update-alternatives --install "/user/bin/java's" "java's" "<Directory where JAVA has been extracted>/bin/java's" 1

Step 8) Tell Ubuntu that our installation i.e., jdk1.8.0_05 must be the default Java.
Use below commands to do this-
Sudo update-alternatives --set java <Directory where JAVA has been extracted>/bin/java
sudo update-alternatives --set javac <Directory where JAVA has been extracted>/bin/javac
Sudo update-alternatives --set javas <Directory where JAVA has been extracted>/bin/javas

Step 9) Test the installation using below command,
java -version
A successful installation will show information as seen in the above screenshot.


Leave a Comment